将github上的Hexo网站托管到AzureWeb平台
一、注册Azure学生免费账号
打开 imagine Cup 官网,官网为学生开发人员工具,资源和体验 | Imagine Cup (microsoft.com)
浏览此页面的最下方,访问:面向学生的 Azure。
注册的时候地址不要选大陆地区,可以选择中国香港。
Azure网站为主页 - Microsoft Azure
二、创建静态 Web 应用
点击创建,托管计划选择免费,部署详细信息选择其他。
如果直接选择 Github,然后选择对应的仓库,Azure 会自动在仓库里设置 Github Actions,为了演示选择其他,在创建后手动配置。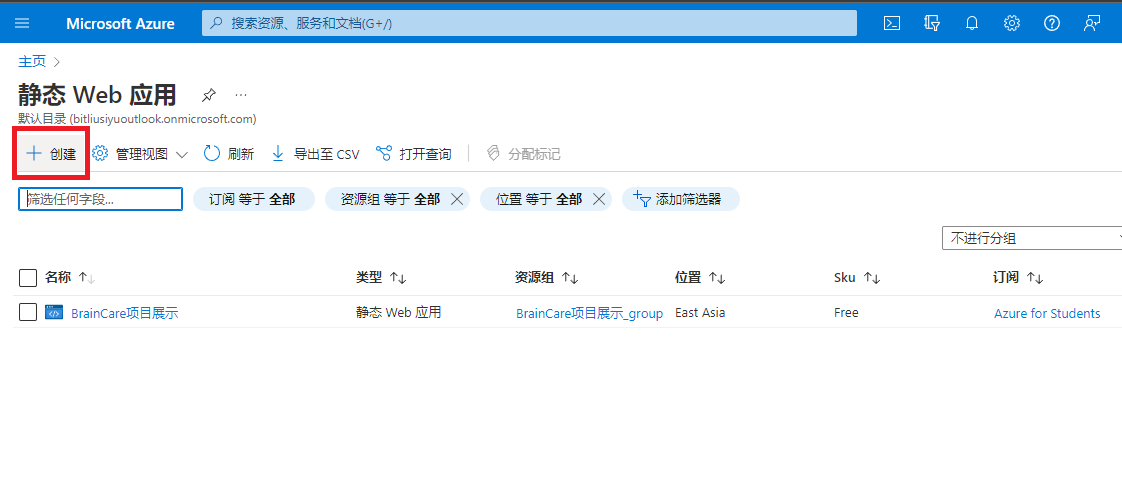
选择管理部署令牌,是一个序列号,需要复制一下,等会拷贝到github仓库中。
三、创建github项目
在github中正常创建新项目,并且创建main分支。
进入创建的github仓库,依次选择Settings => Security => Secrets => Actions。
新建一个 Secret,名称 AZURE_STATIC_WEB_APPS_API_TOKEN,将第二步中复制的部署令牌粘贴进去。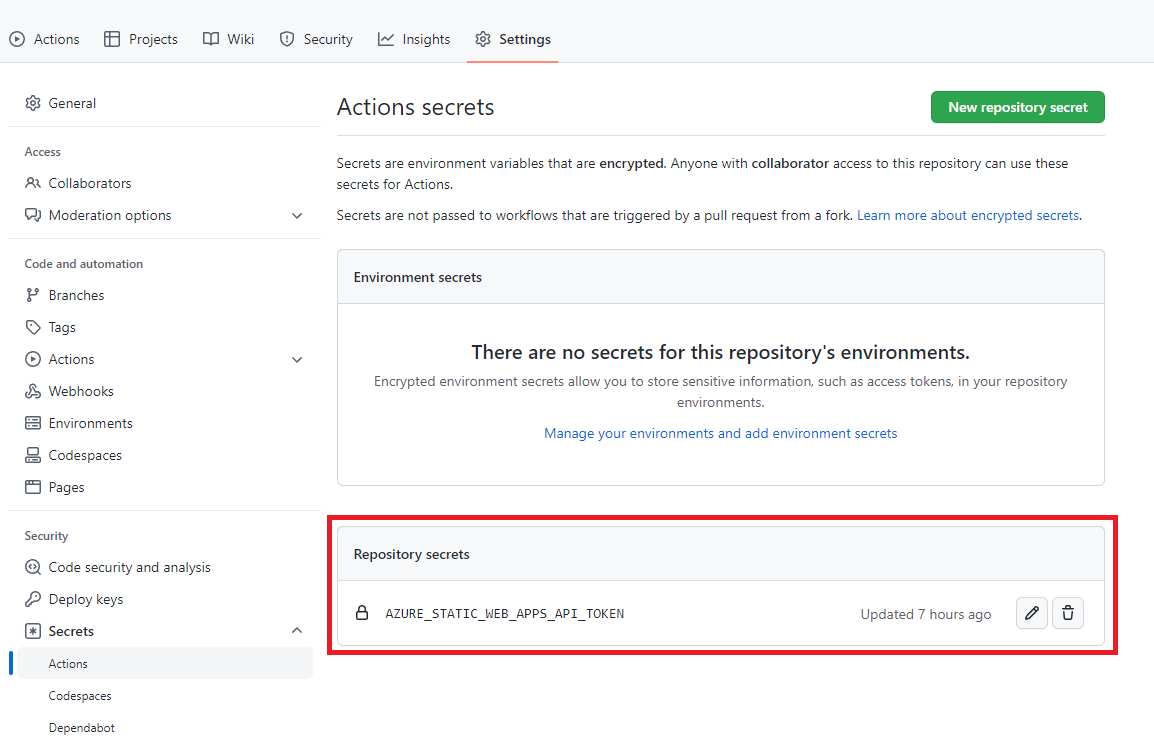
四、在Hexo项目中创建 github action 文件
在Hexo项目根目录下创建 .github/workflows目录,然后创建 github action 文件: static-web-app.yml。
路径如下图所示。
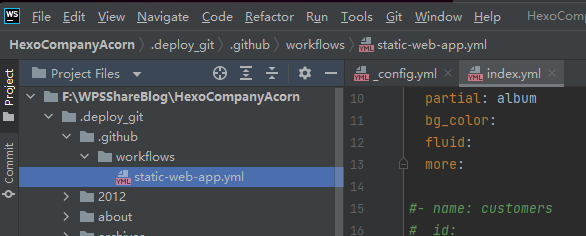
github action 文件内容如下:
name: Azure Static Web Apps CI/CD

on:
  push:
    branches:
      - main

jobs:
  build_and_deploy_job:
    if: github.event_name == 'push'
    runs-on: ubuntu-latest
    name: Build and Deploy Job
    steps:
      - uses: actions/checkout@v2
        with:
          submodules: true
      - name: Build And Deploy
        id: builddeploy
        uses: Azure/static-web-apps-deploy@v1
        with:
          azure_static_web_apps_api_token: ${{ secrets.AZURE_STATIC_WEB_APPS_API_TOKEN }}
          repo_token: ${{ secrets.GITHUB_TOKEN }} # Used for GitHub integrations (i.e. PR comments)
          action: 'upload'
          app_location: '/'
          output_location: 'public'
          app_build_command: 'npm run deploy'
将github仓库的链接配置在_config.yml文件中,如下:
# 上传到Azure平台
deploy:
  type: git
  repo: git@github.com:bitbci/BrainCareAzureWeb.git
  branch: main
正常使用hexo d指令上传项目即可。
上传之后需要等一段时间,大概半分钟,就可以打开网页看看效果了。
五、自定义域名
进行到这一步,已经可以正常查看网页了。
Azure有一个分配的域名,如下。

如果不想用分配的域名,也可以在腾讯云等平台购买域名,在Azure里面配置即可。
以腾讯云为例,域名控制台网址为:我的域名 - DNSPod-免费智能DNS解析服务商-电信_网通_教育网,智能DNS
Azure配置方法在以下链接的视频中:先配置txt记录,再配置CNAME记录。

